From Outdated Wallpaper to Updated Paint!
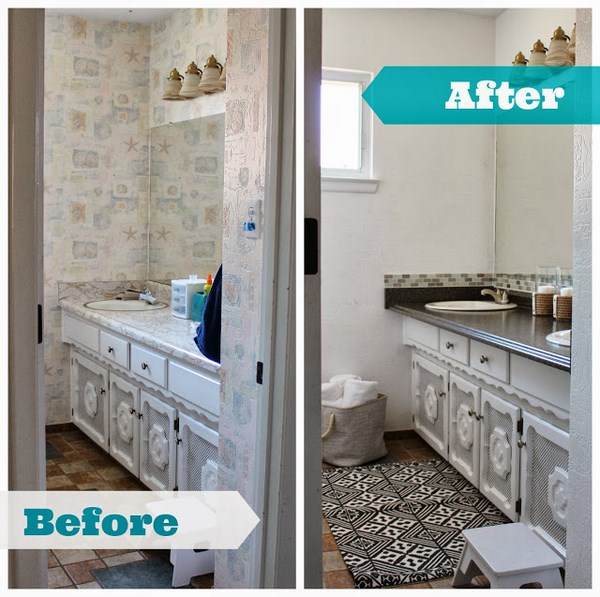
There is a time and a place for wallpaper, but I’m not going to lie, the opportunities for it are dwindling. If you are ready to ditch the wallpaper and trade up for a more updated painted look, we can help walk you through it!
Removing Wallpaper
There are many ways to do this including chemicals, steamers, and strippers. Here is a tried and true method to consider:
- Clear and prep your space. Protect all flooring, trim, and outlets.
- Buy or create your own remover solution. You can make your own with boiling water and fabric softener.
- This step is optional, but recommended for wallpaper that is super stubborn. Score the wall – this allows for maximum saturation when you spray your solution.
- Using a pump sprayer, spray the walls with solution.
- Remove the wallpaper – using a putty knife, start scraping the areas that you see are already peeling, edges, etc. Remove any remaining residue while being careful to not damage the wall
Note: If this process isn’t getting the job done, don’t hesitate to rent a steamer from your local hardware store. If you don’t want to rent a steamer, you may be able to use the steam function on your iron instead!
Hooray! The wallpaper is off! Now what? You might be tempted to just stop here, but keep pushing on. Unfortunately, there is still old glue to remove and possible damage on the walls to be repaired. Old glue can be removed using a putty knife and a spray bottle solution (warm water and dawn soap). Once the glue is removed, wipe off any remaining dust or grime. Next step is to patch up and repair any damage to the wall since removing the wallpaper.
Once everything is cleaned and repaired, you can begin prepping the walls. Ensure that the walls are dry before applying a primer. Once the primer is applied allow for adequate time for drying and then go ahead a paint!
Additional Wallpaper Removing Tips
- Use a narrow, sturdy putty knife when scraping away at wallpaper! You might be tempted to use a large, wide putty knife since it might seem like it will remove more wallpaper. This is not the case; the larger putty knifes tend to be more flimsy which may cause you to accidentally gouge a hole in the wall.
- Is your wallpaper over 30 years old? Rent a steamer to save yourself time. Older wallpaper tends to be the toughest to remove. Skip all the unnecessary headache and use a steamer right from the start.
- Wallpaper has two layers, the top layer (holds the design) and the paper backing (holds the glue). Try the best you can to remove the top layer and then saturate the paper backing with the removal solution. This will ensure that you leave the wall smooth and undamaged while removing most of the adhesive.
Alternative Ideas
Professionals always recommend stripping wallpaper before painting, but if you must, you can paint over it. If the wallpaper is in relatively good condition (little to no bubbling, peeling, etc.), painting over it will give your wall a fresh look with much less prep work. Sometimes, removing wallpaper (especially if it is old) can do more damage to the wall than what is expected. This will require a little prep work, though.
Here are some common fixes:
- Replace any damaged sections of the wallpaper.
- Seal down loose edges with a clear coat of caulking.
Once you’ve made the necessary repairs, apply an oil-based primer before applying paint. When you do paint, paint at least two coats for the best coverage.
If this all seems like more trouble than it’s worth, please give us at our Durango office at (970) 903-4305! We have over 25 years’ experience with painting, paper hanging and paper removing and would be happy to do it for you!
Sources: